


Before you start
- A Specialist or Admin role, which gives Liveline access. See Roles.
- An activity with a Stream step, or use Quick Start for a session with no setup.
Liveline at a glance
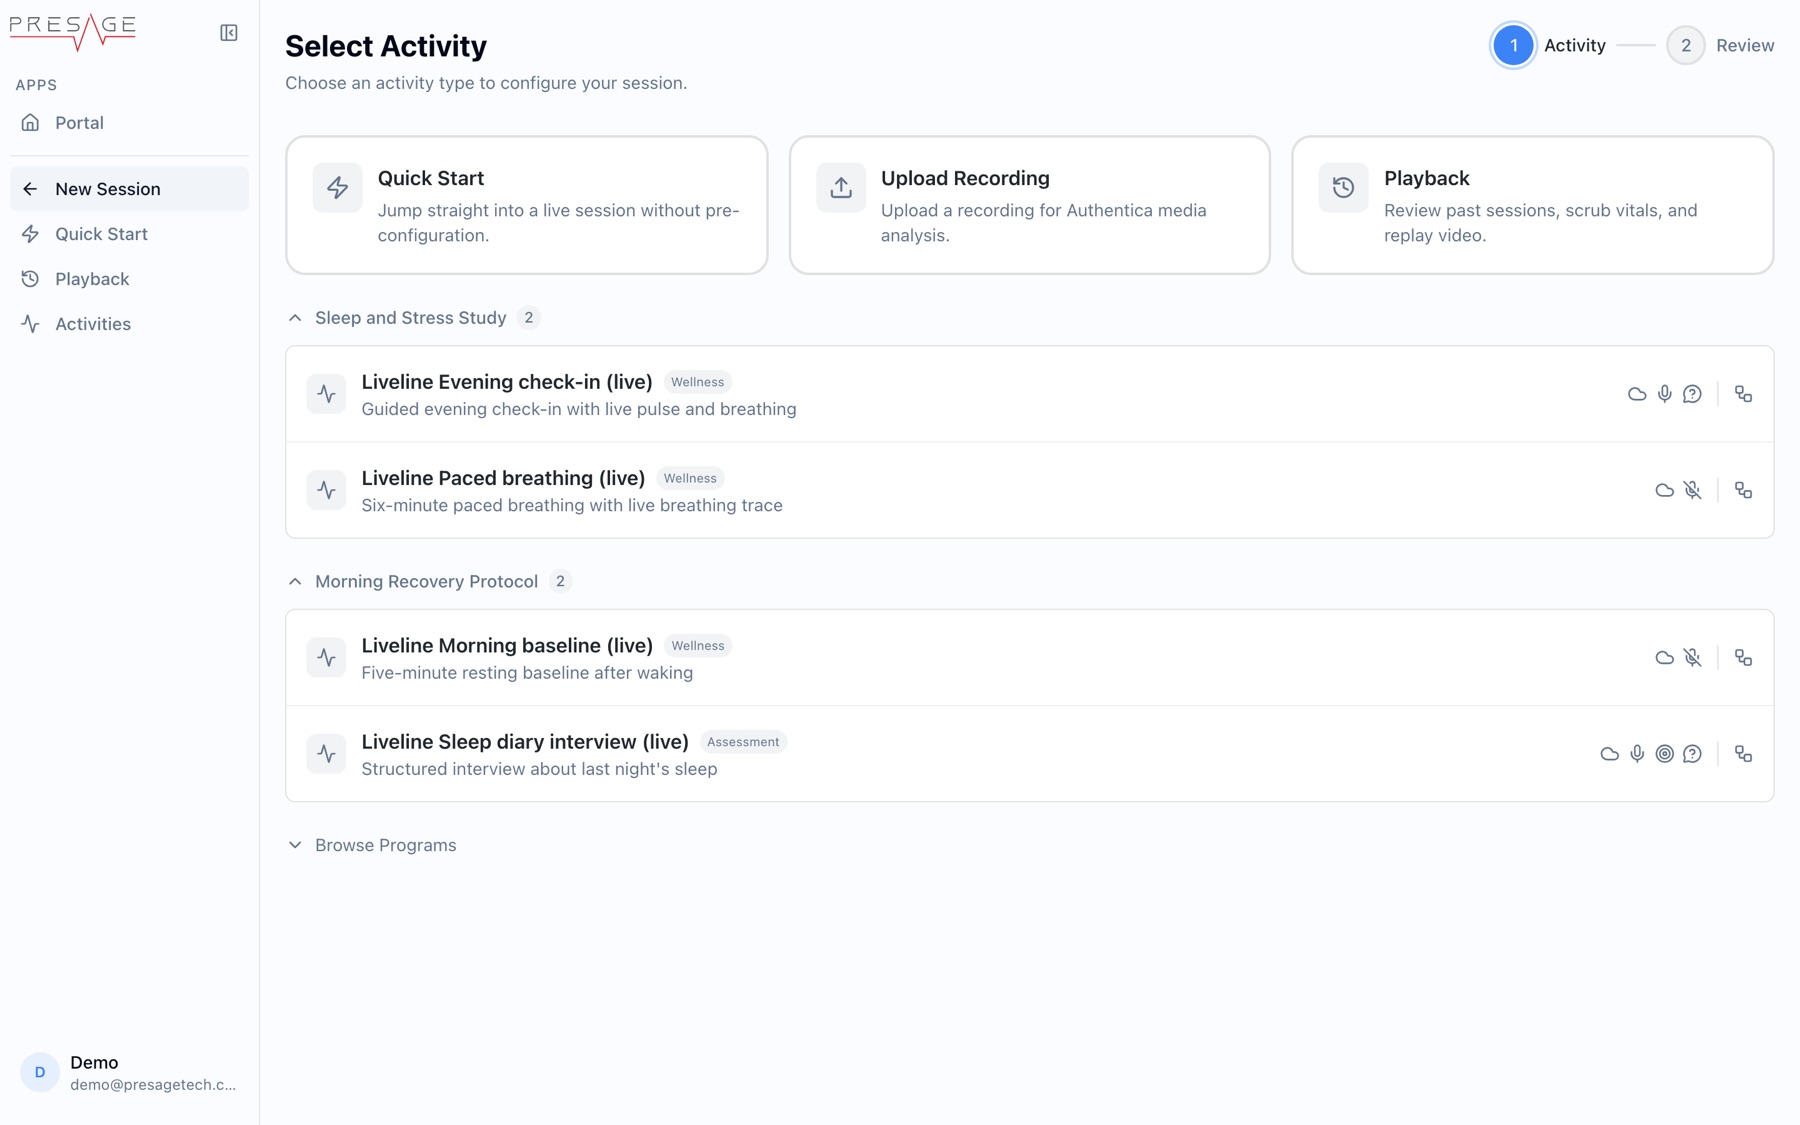
Open Liveline from Presage Portal. The sidebar has New Session, Quick Start, Playback and Activities.
- Quick Start: jump straight into a live session without pre-configuration.
- Upload Recording: upload a recording for analysis. See Upload a recording.
- Playback: review past sessions, scrub vitals and replay video. See Playback.
- Activity list: live activities grouped by program. Open Browse Programs to find more.
Activity row icons
| Icon | Means |
|---|---|
| Cloud | Saves to cloud: the session recording (video and audio) is saved so you can replay it in Playback. A crossed-out cloud means Not saved to cloud. |
| Microphone | Records audio. A crossed-out microphone means No audio. |
| Steps | Hover to see the activity’s steps, for example “Overview → Capture → Summary → Live stream”. |
Guide
-
Choose an activity
Click New Session. On Select Activity, pick a live activity, grouped by program, or Quick Start.
Select Activity -
Check the setup
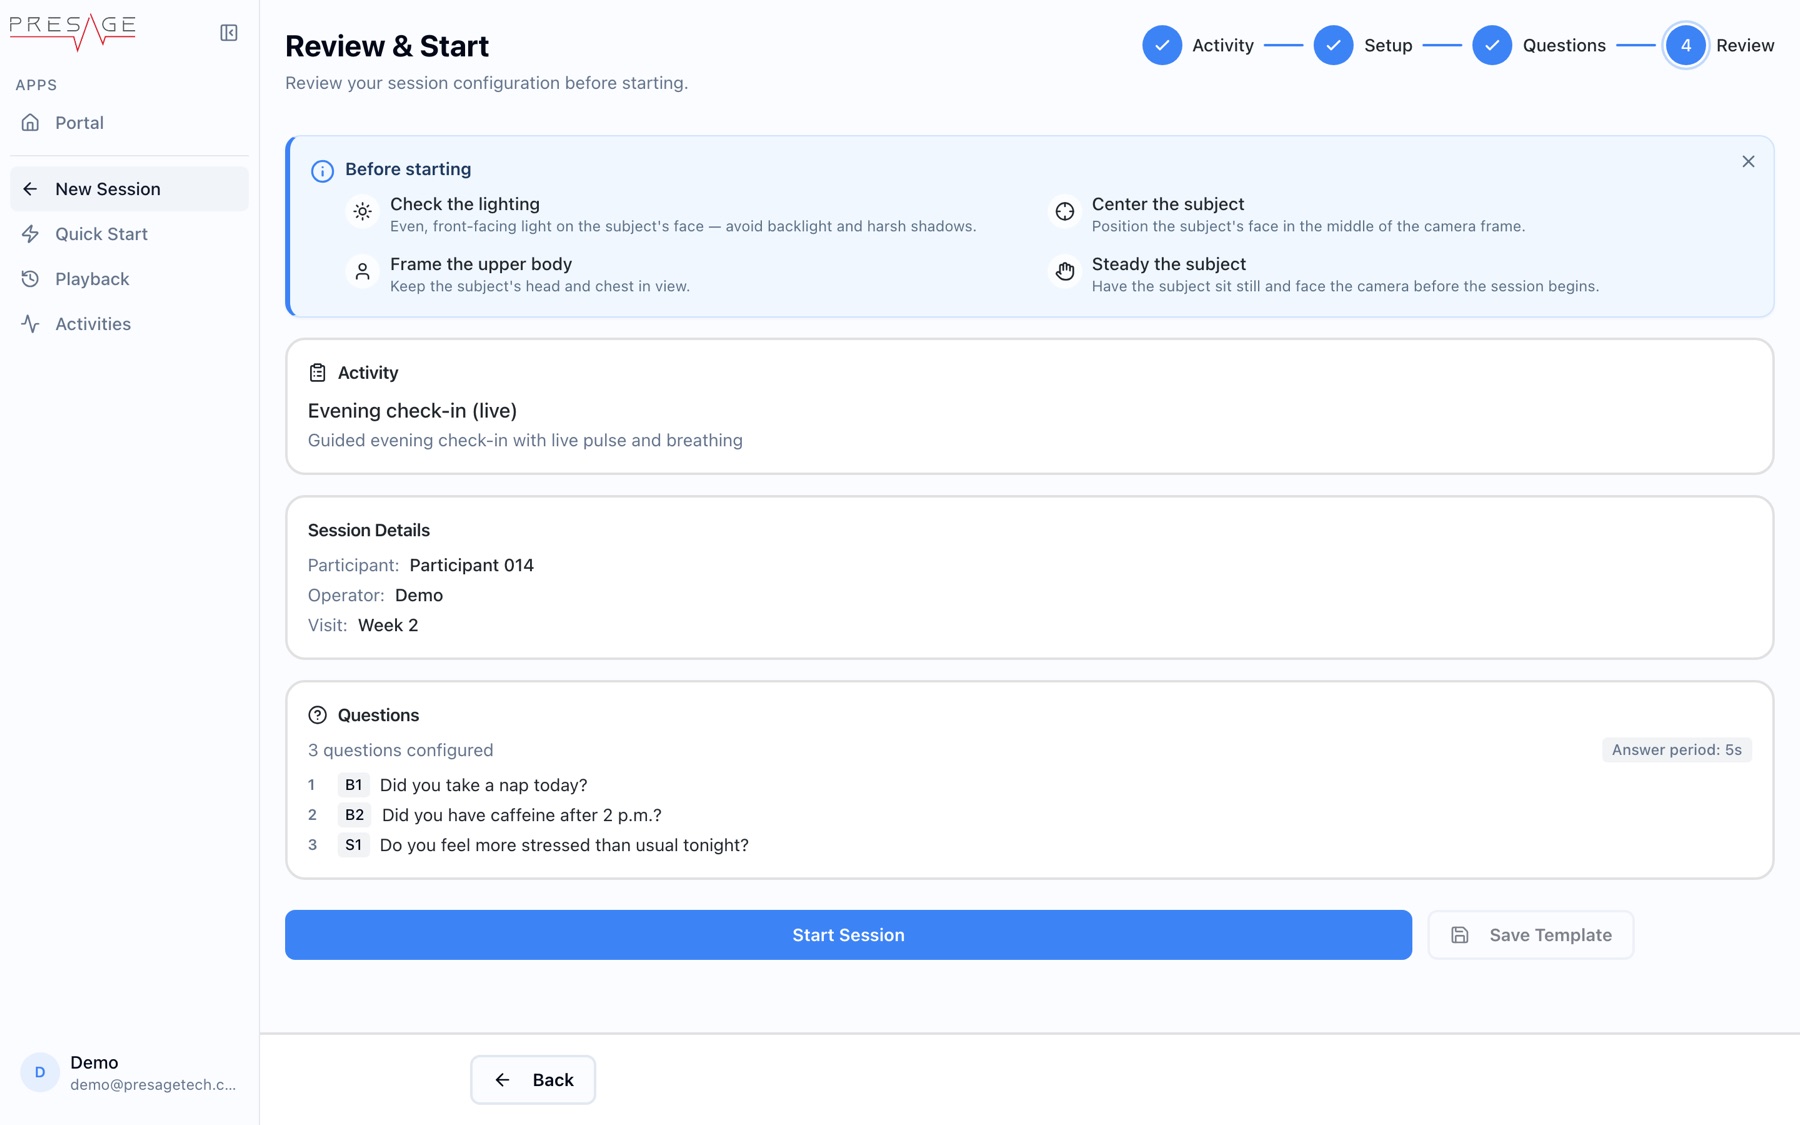
Review & Start shows a Before starting checklist, the activity, and whether questions are on. Work through the checklist with the participant:
- Check the lighting: even, front-facing light on the face. Avoid backlight and harsh shadows.
- Center the subject: face in the middle of the camera frame.
- Frame the upper body: head and chest in view.
- Steady the subject: sitting still and facing the camera before the session begins.
Review & Start -
Start the session
Click Start Session. To reuse this setup later, click Save Template first.
-
Connect the participant
When the participant reaches the Stream step in Coherence, they see a room code. Enter it in Liveline, or share a Liveline link, to join their room. In person, the participant can scan the QR code Liveline shows with their phone camera instead, which opens the session in Coherence.
-
Watch and annotate
The live view uses the same panels as Playback: the Vitals Timeline, the Camera Feed, live pulse and breathing readouts, and Notes, Scores and Events. To add a note, type it in the Notes tab and press
Enter.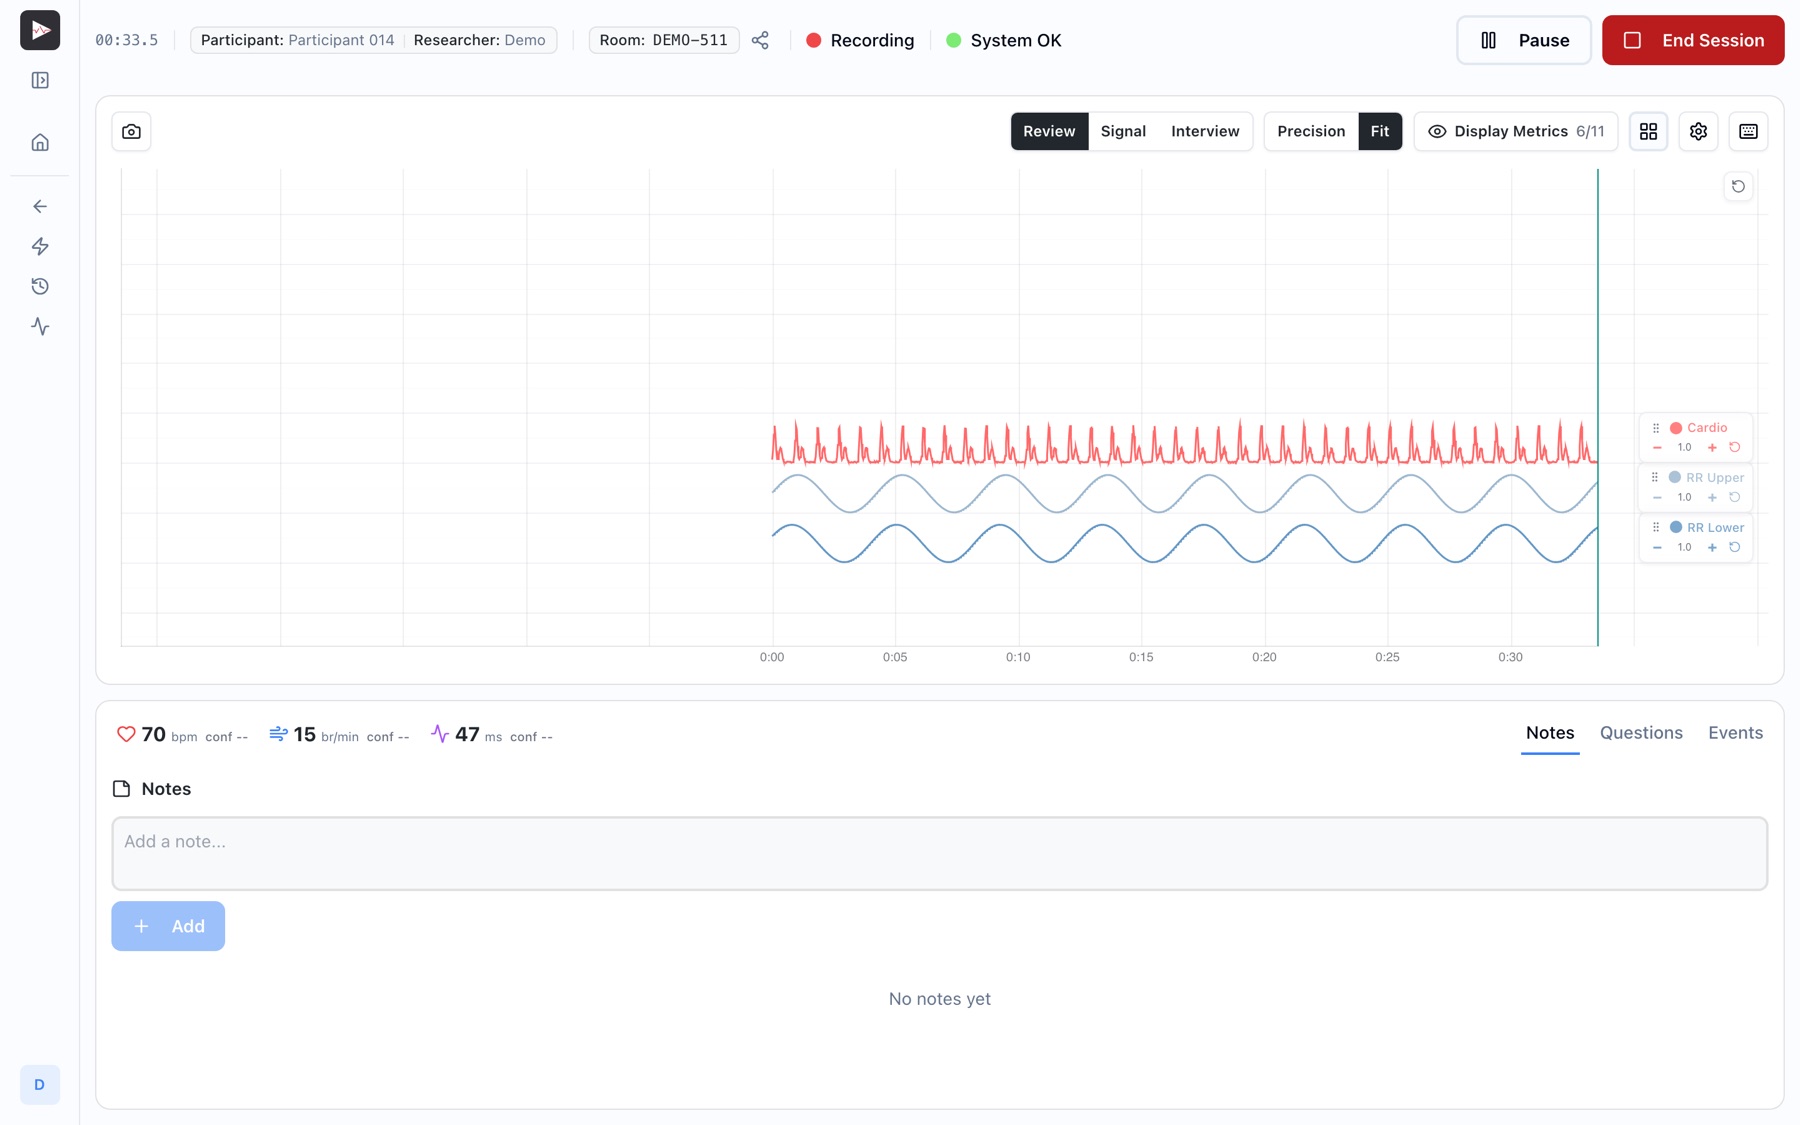
A live session in progress -
End the session
When you end it, the session appears in Session History, ready for Playback.
Customize the live view
Use the toolbar above the Vitals Timeline to choose what you see during a session. These controls change the display only. Every vital is still recorded.
- Camera feed: click the camera button at the left of the toolbar, or press C, to show or hide the participant's video.
- Display Metrics: choose which channels are plotted, such as Cardio, RR Upper and RR Lower. The count shows how many are on, for example 6/11. Use Show all or Hide all to switch them together.
- Face landmarks: press L to show or hide the face mesh on the video.
- Views: Review, Signal or Interview change how the channels are drawn, and Precision or Fit set the chart scale.
- Layout: click the grid button to choose which panels appear and where.
The same controls work in Playback. See Display Metrics and Customize the layout.
Ask and answer questions
If the activity has Capture Questions turned on, the live view shows a Questions tab next to Notes and Events. The tab appears while the session is recording.
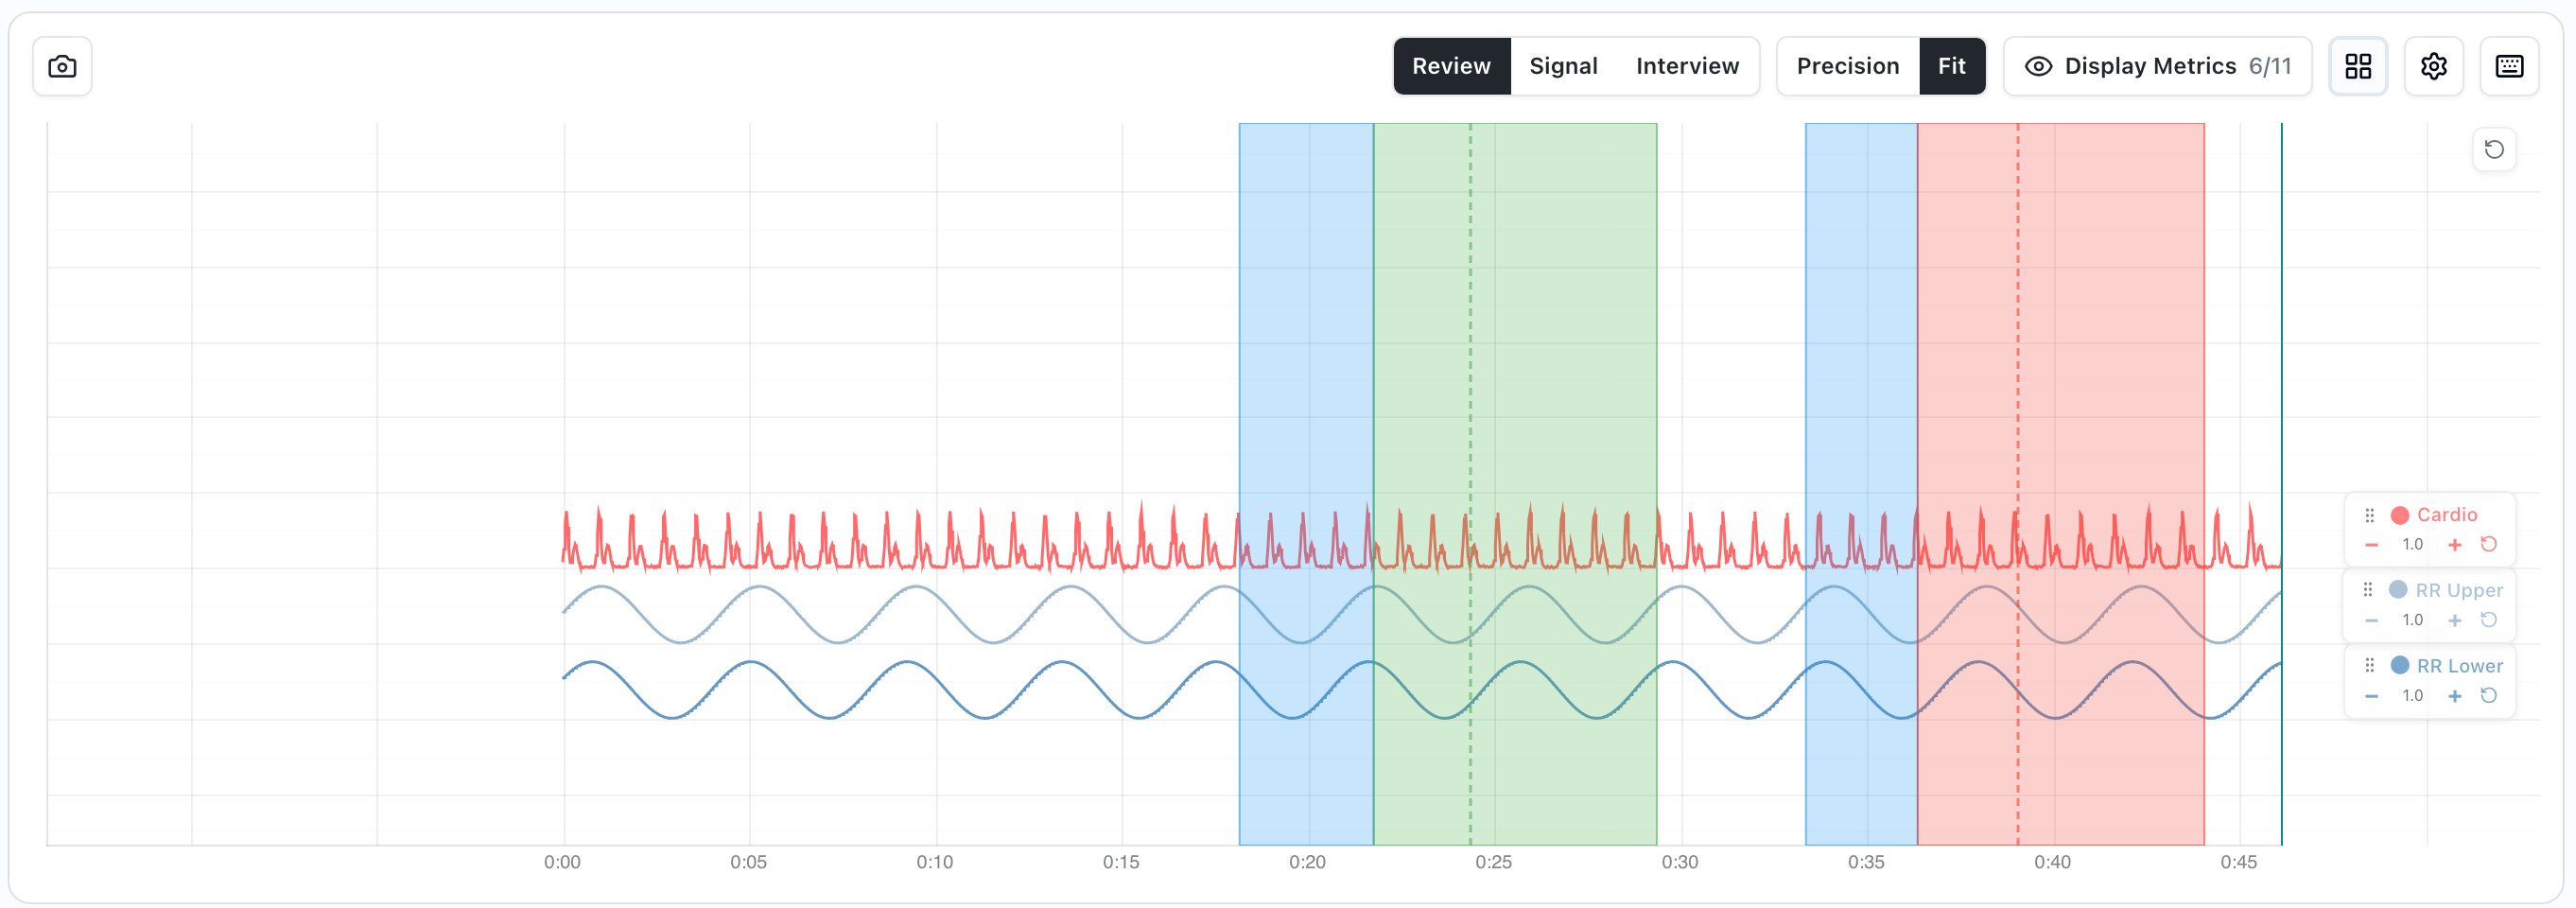
You read each question aloud, mark when you start and stop asking, and record the answer. Liveline marks both parts on the Vitals Timeline so you can see how vitals changed while the participant heard the question and while they answered.
-
Open the Questions tab
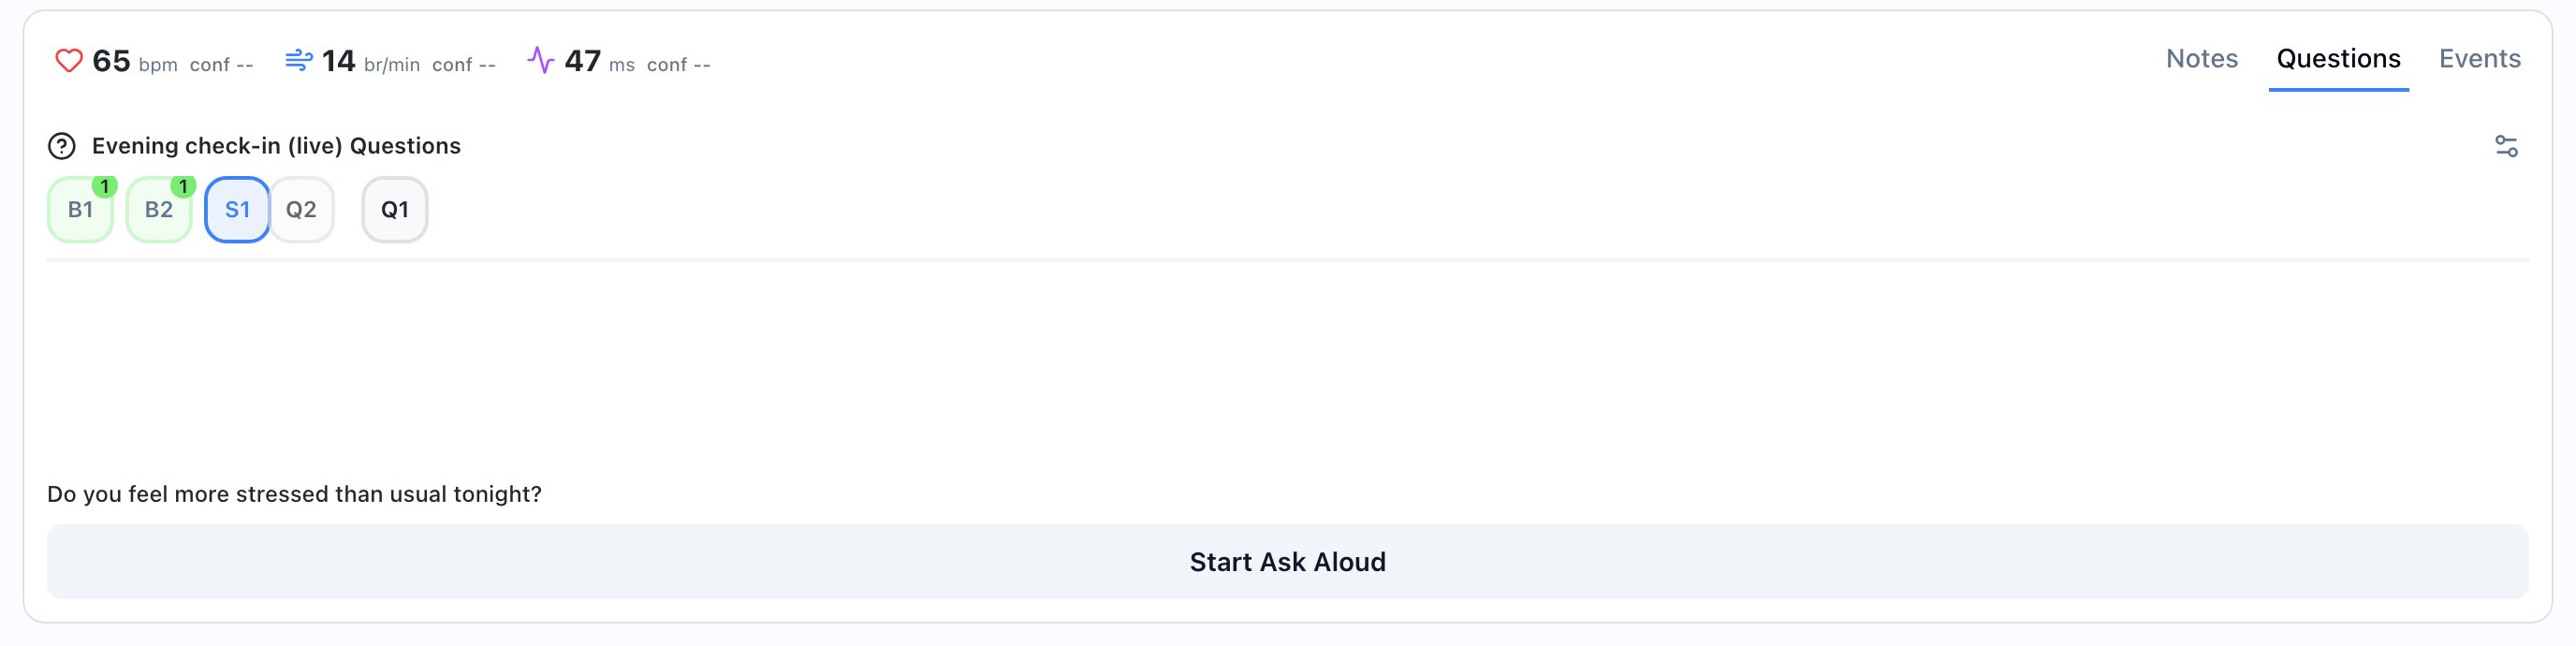
The tab shows the question set name, a row of question buttons (B1, B2, S1 and so on) and the text of the current question. The current question has a blue outline. Hover over a button to see its full text.
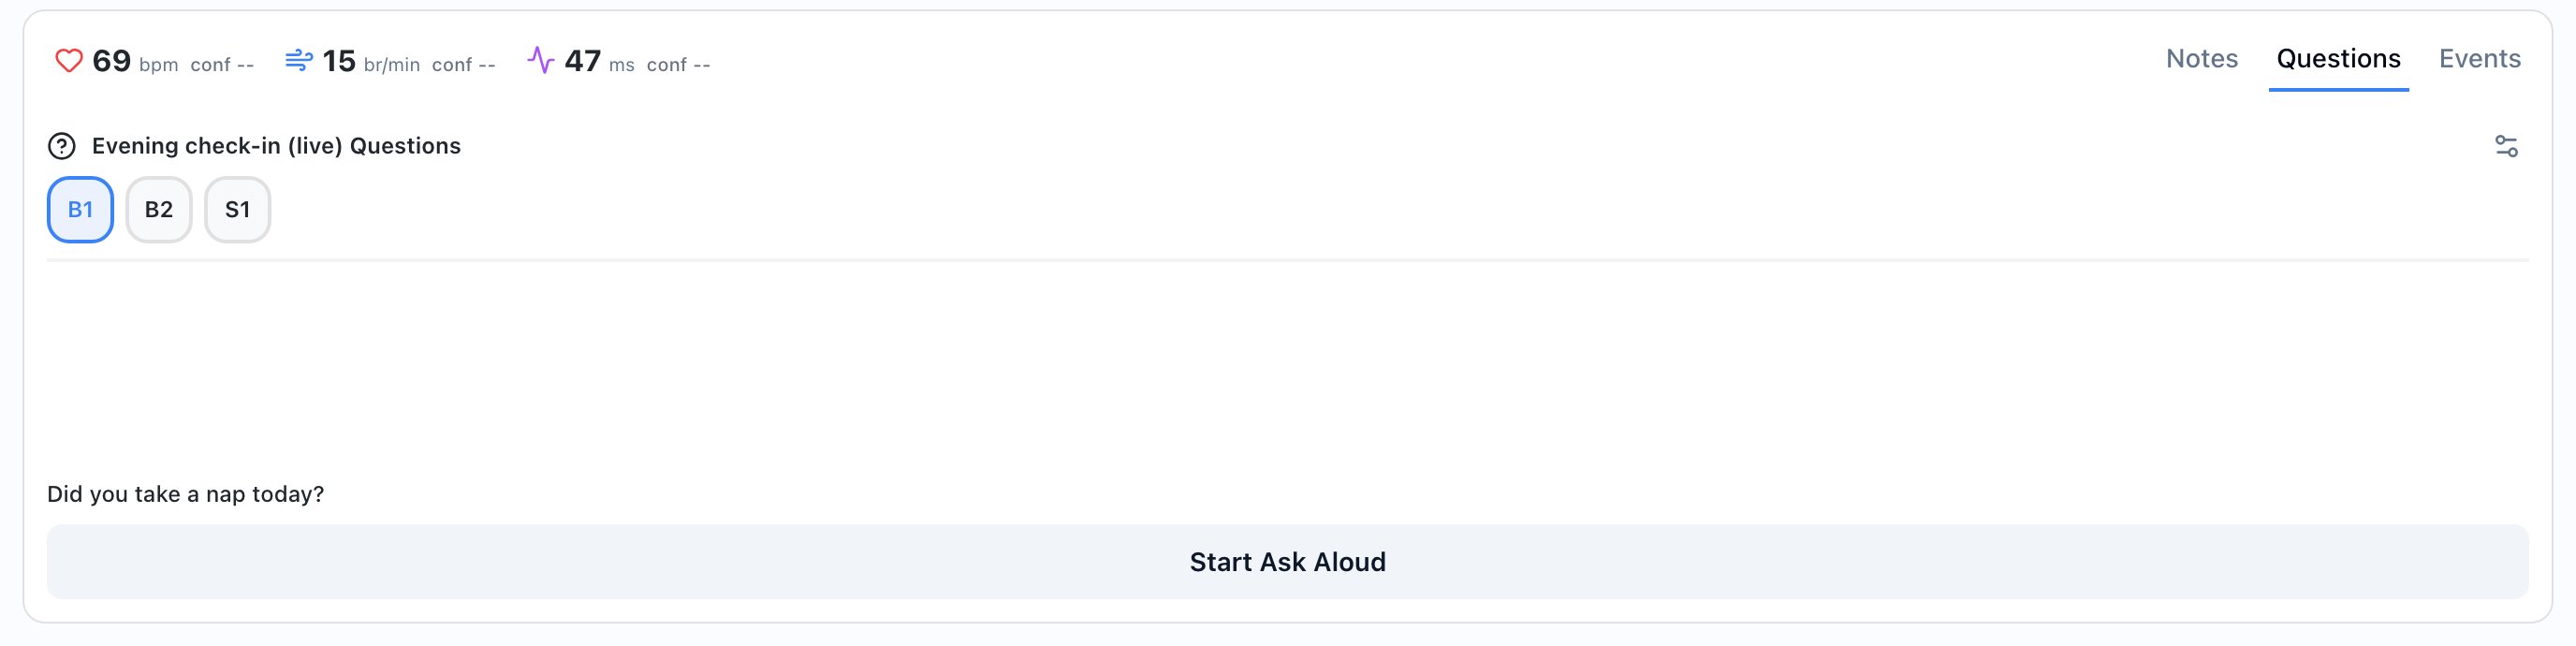
The Questions tab before the first question is asked. -
Ask the question
Press and hold
Spacewhile you read the question, then let go when you finish. Or click Start Ask Aloud, read the question, and click Save Ask. A blue box grows on the Vitals Timeline while you ask.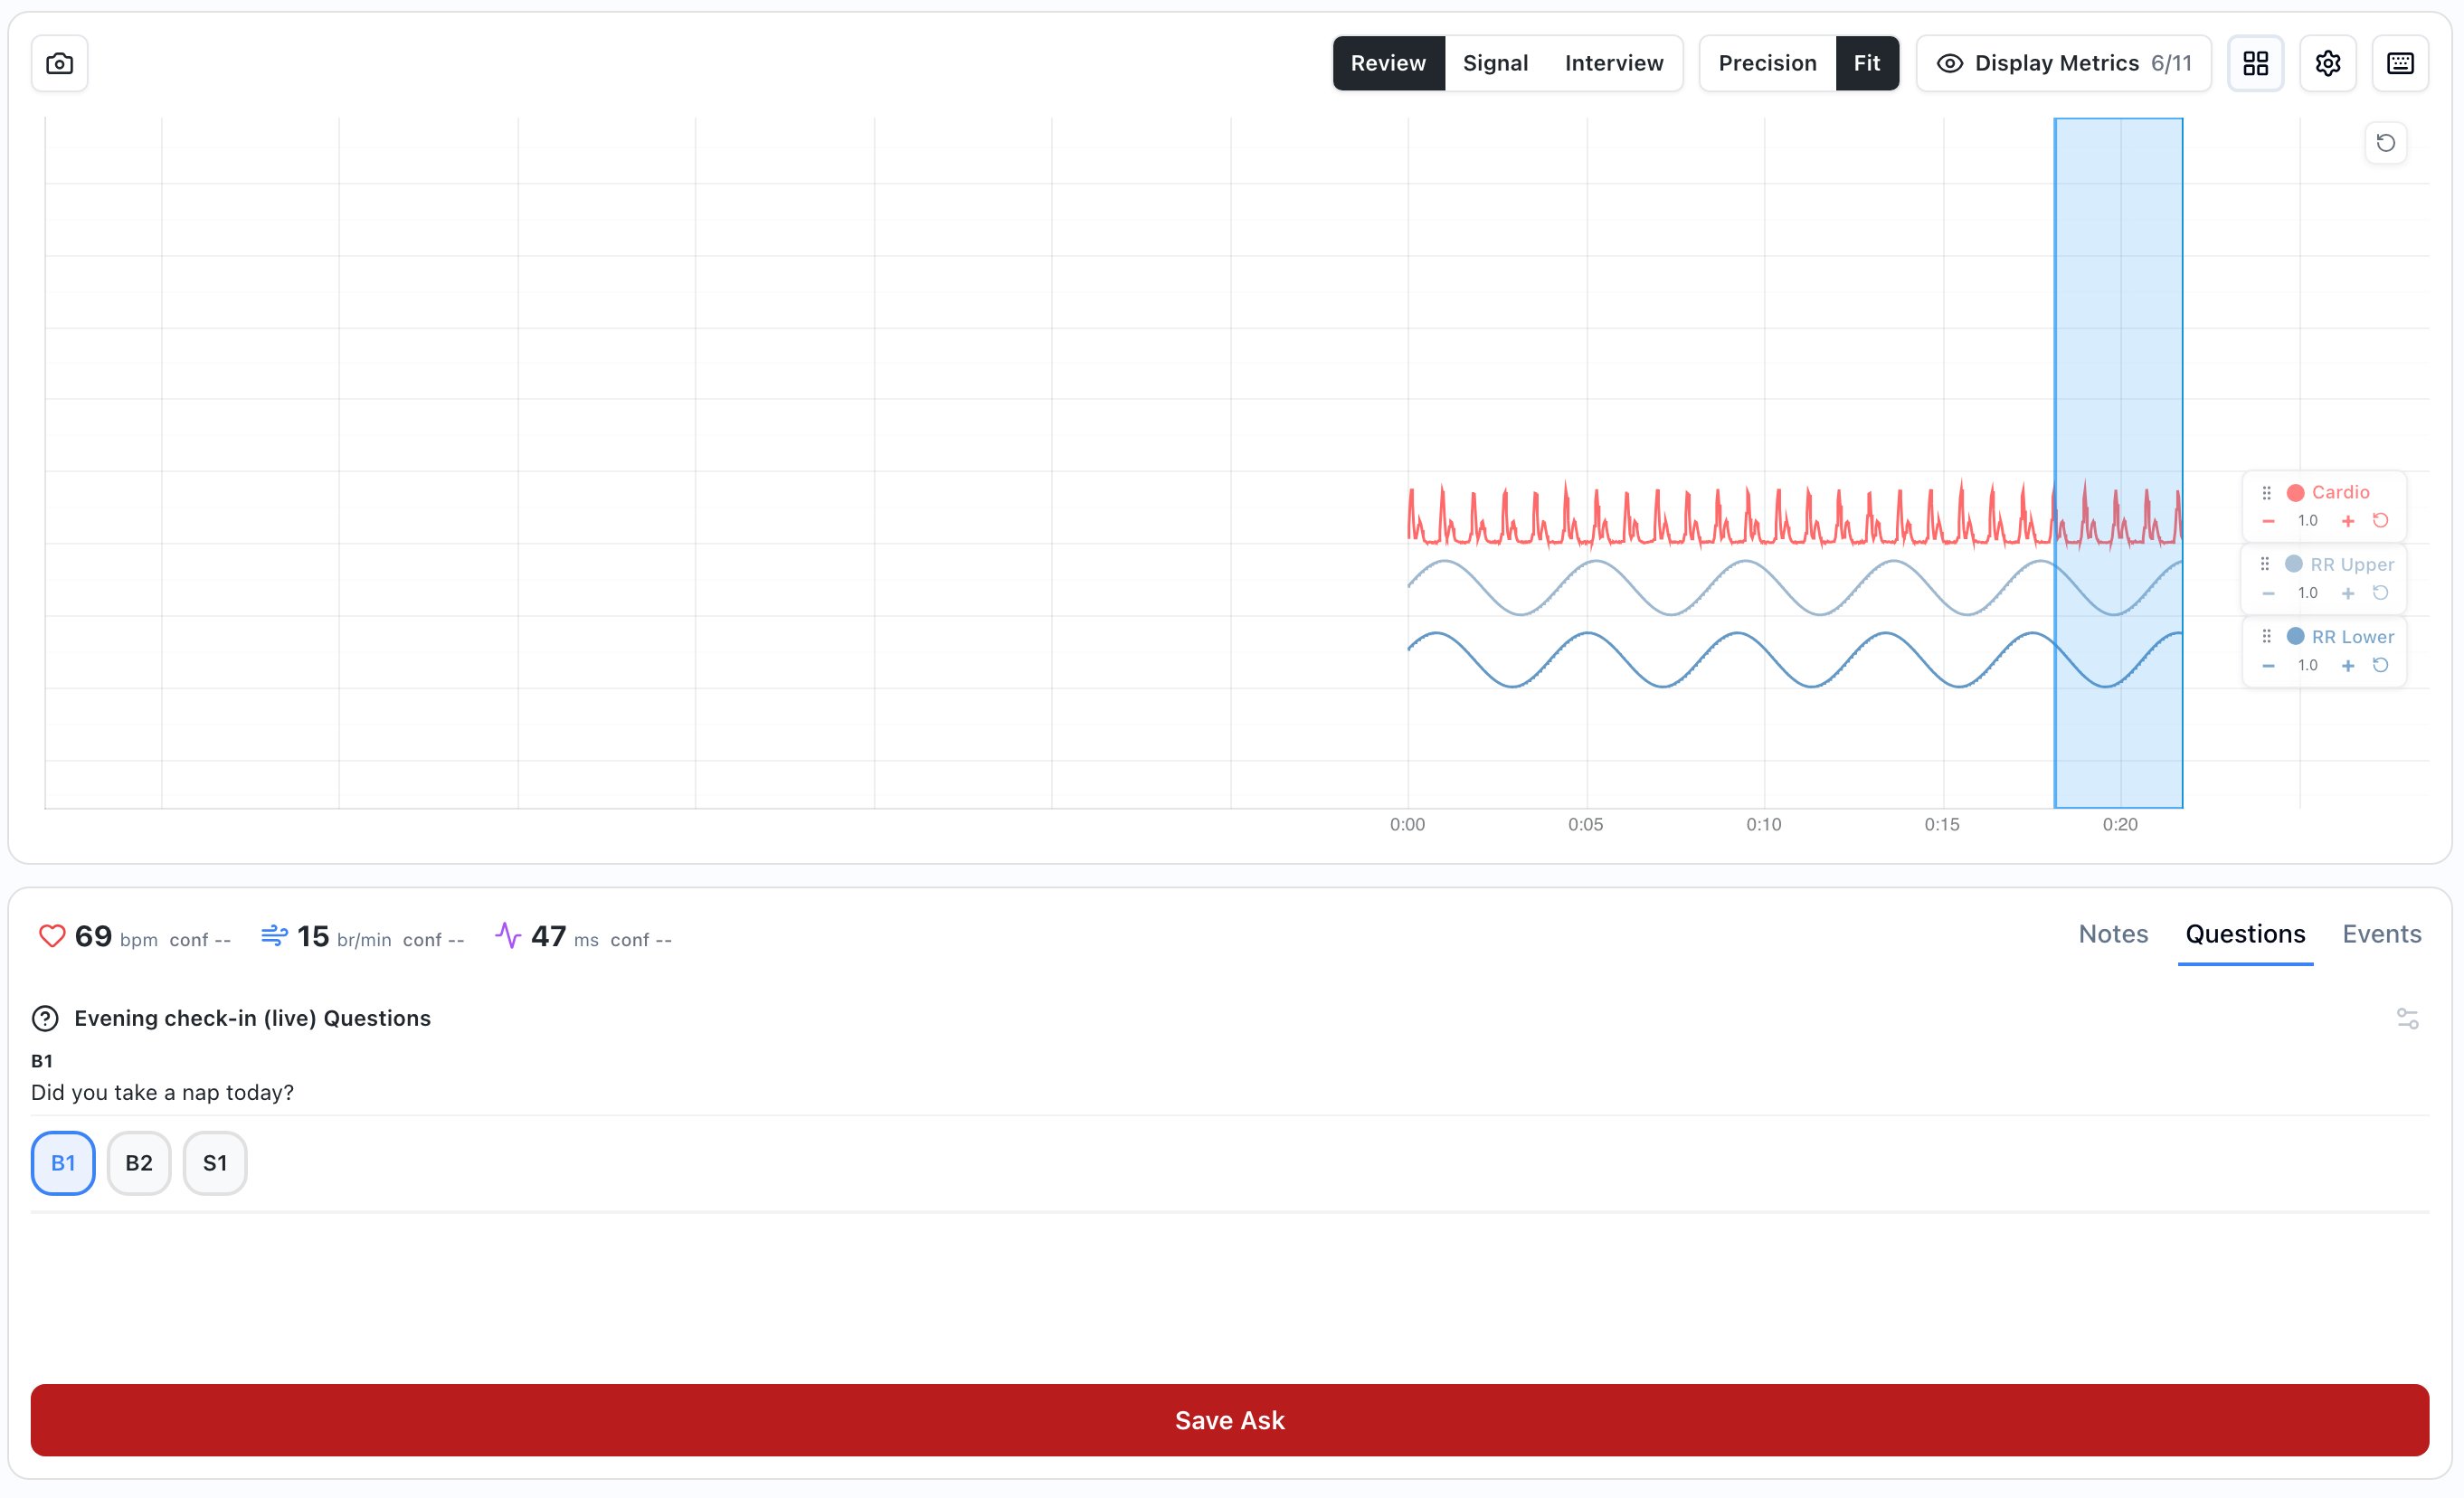
While you ask, the button reads Save Ask and the timeline shows a blue box. -
Record the answer
When the ask ends, the panel shows Awaiting response and a green box starts on the timeline. Record what the participant says:
- Yes/No questions: click Yes or No, or press Y or N.
- Slider questions: move the slider and click Submit.
- Other questions: type the answer in Enter response... and click Submit or press Enter.
The text above the buttons shows which question comes next.
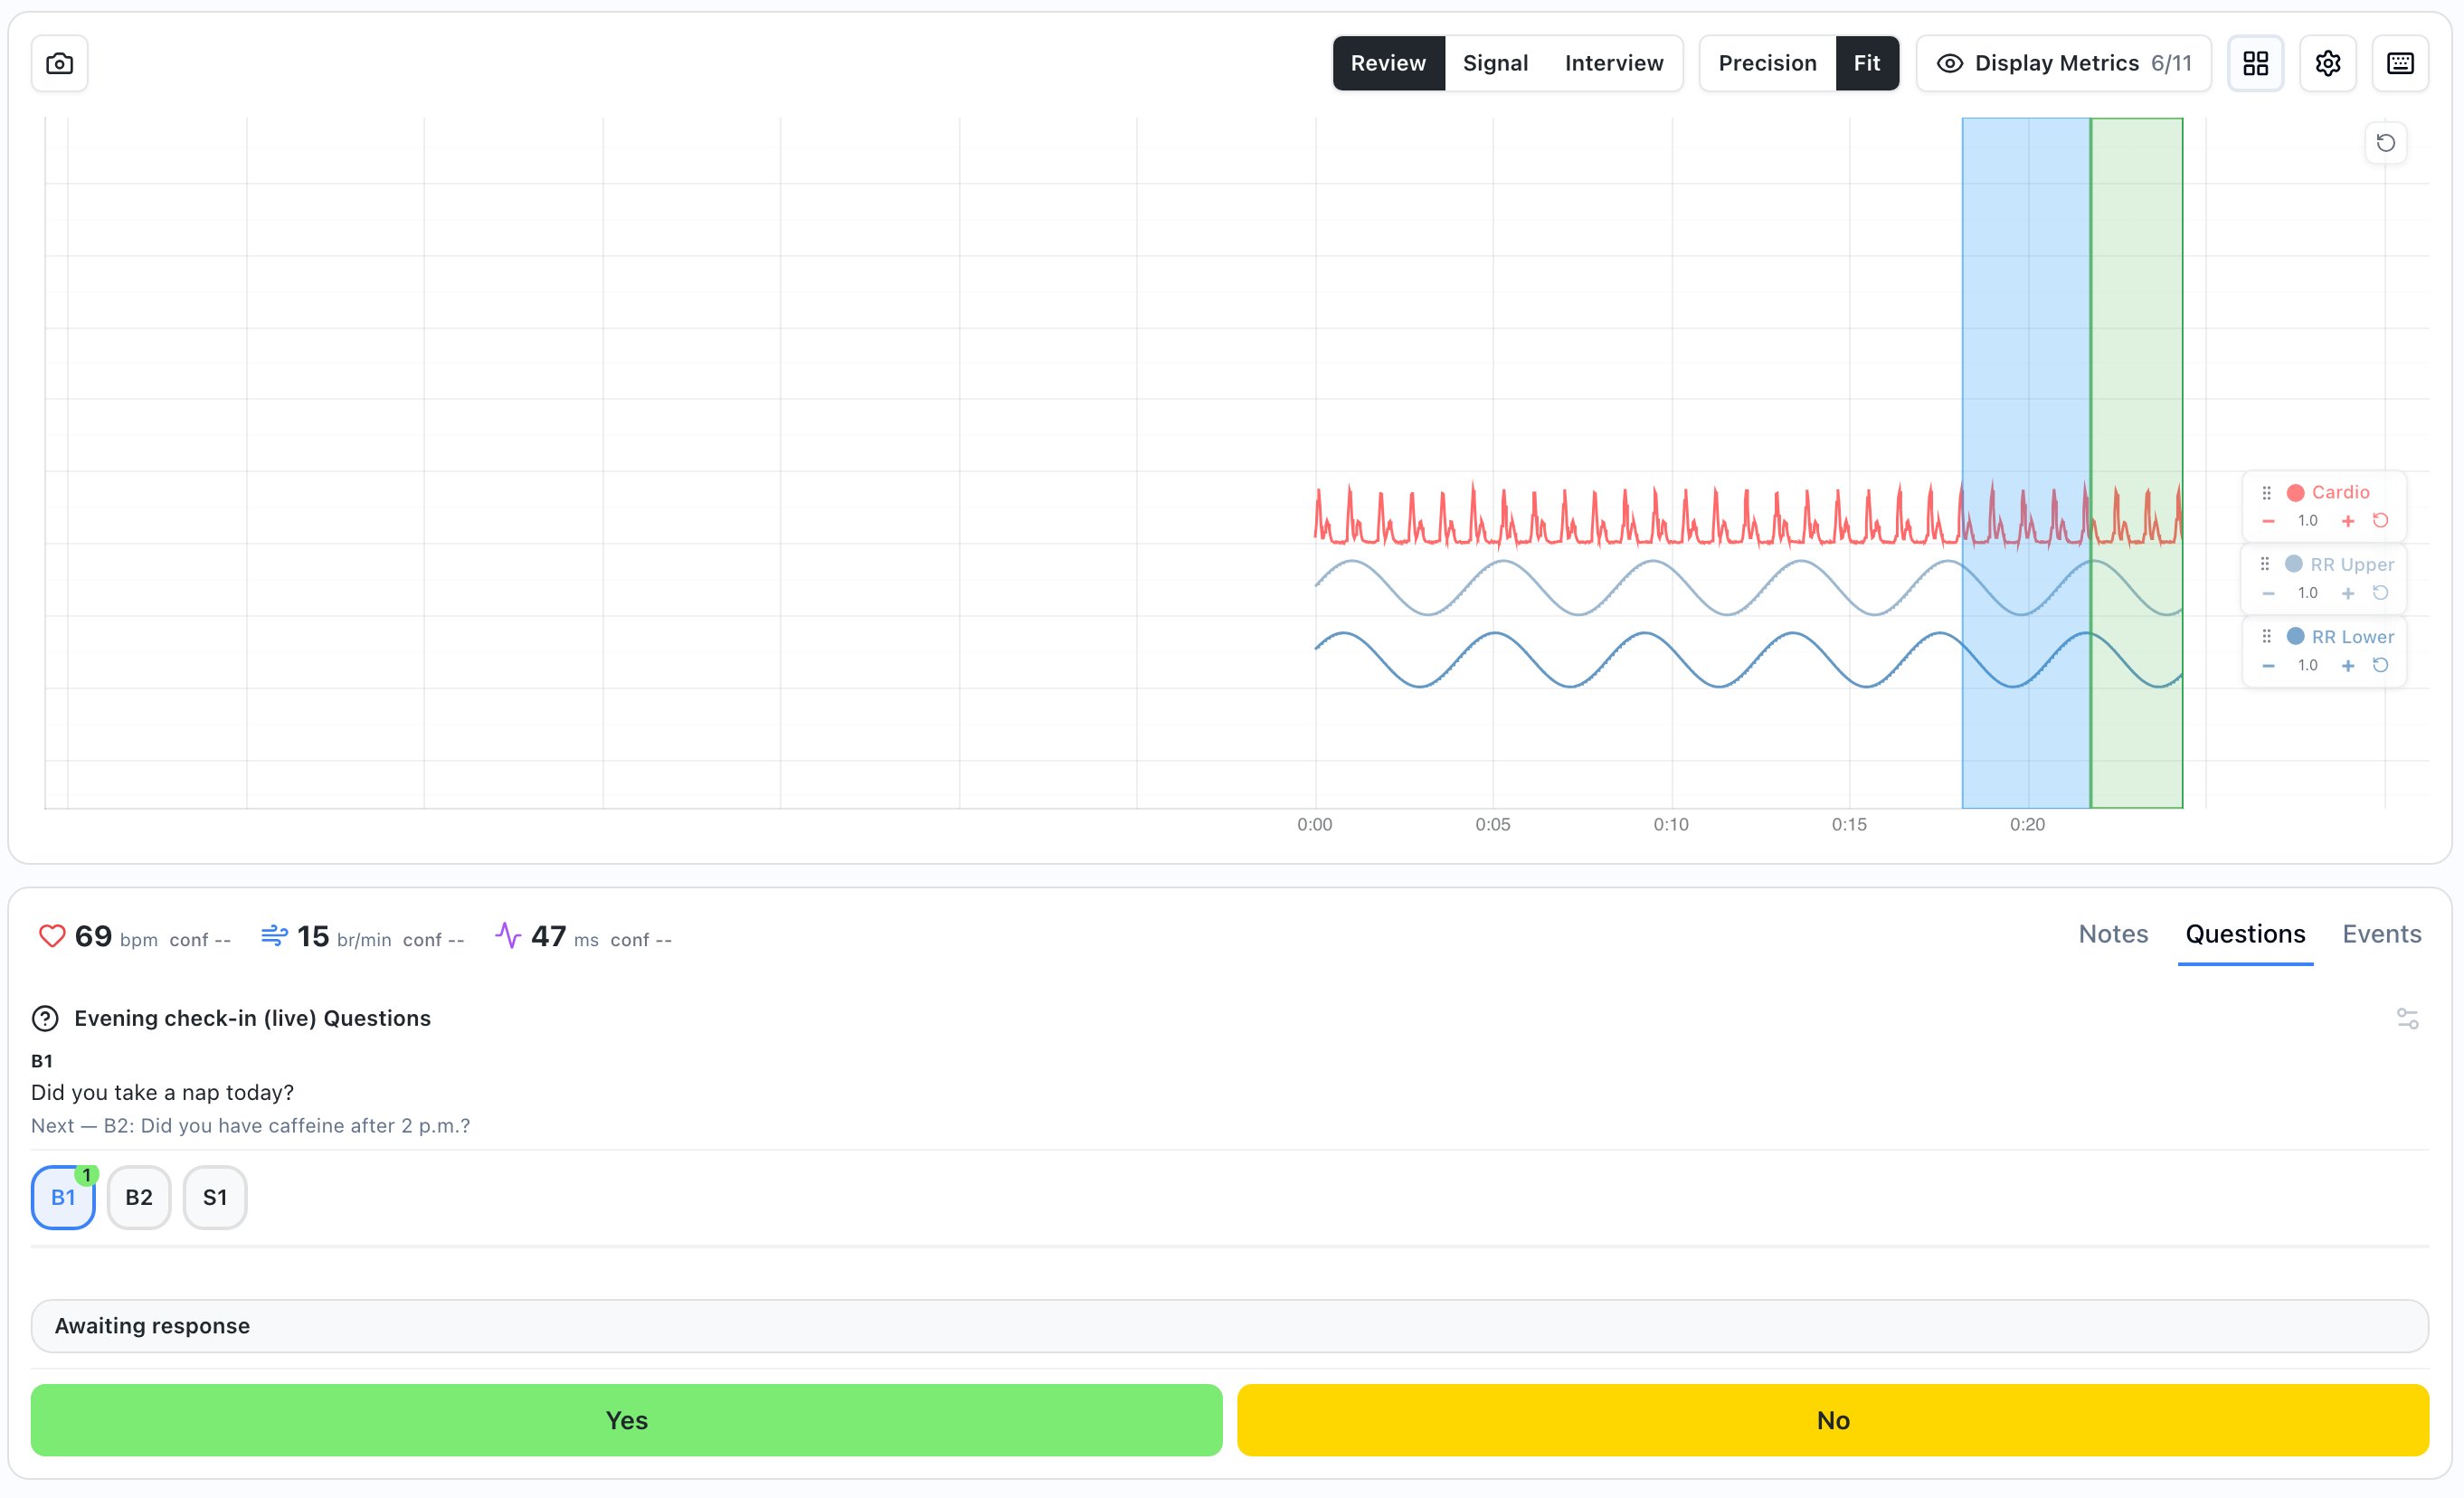
After the ask, record the answer with Yes or No. -
Go to the next question
After you record the answer, the panel shows Answer recorded and Closing… for a few seconds. Then it shows Response recorded with the answer. Click Next Question or press
Enter.Each asked question gets a green tint and a small number that counts how many times it was asked.
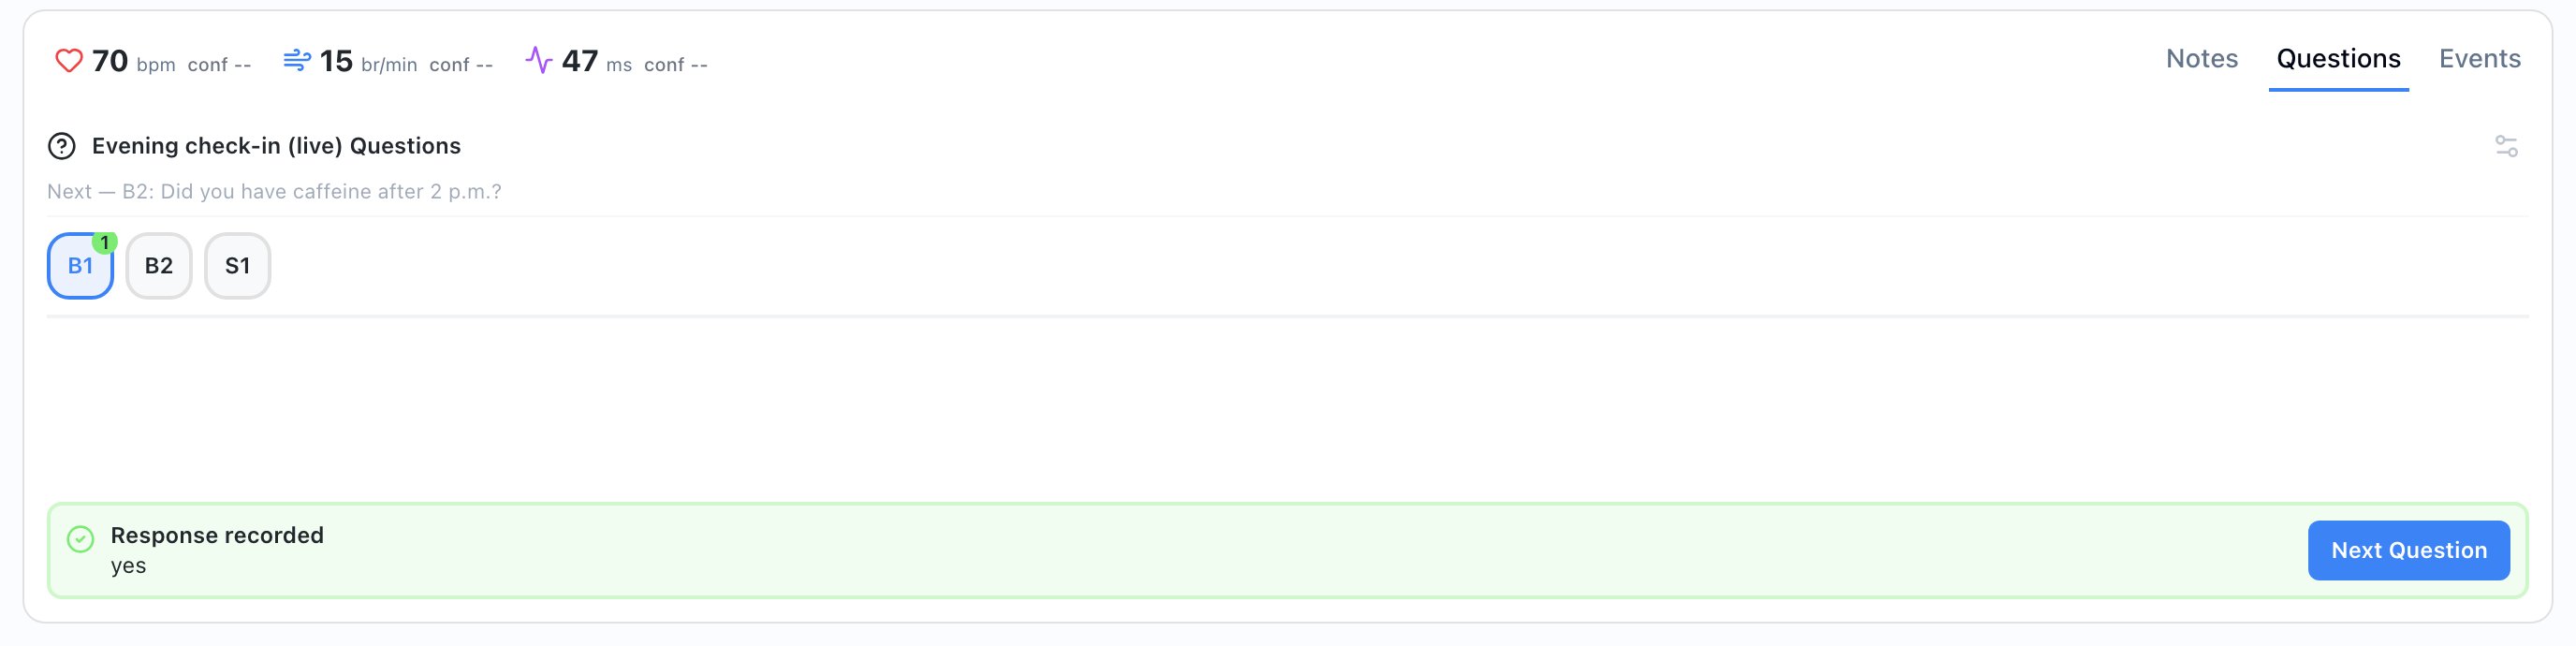
The recorded answer and the Next Question button.
If the participant’s device supports it, a Send to Device button appears next to Start Ask Aloud. It shows the question on the participant’s device so they can answer there. The panel then says Participant answered when the answer comes in.
Asking vs answering on the timeline
Every question leaves two boxes on the Vitals Timeline.
| Mark | What it means |
|---|---|
| Blue box | Asking. Starts when you press Space or click Start Ask Aloud. Ends when you let go or click Save Ask. |
| Light green box | Answering. Starts when the ask ends and grows until you record the answer. |
| Dashed line | The moment you recorded the answer. |
| Box color after the answer | Green for Yes, red for No, amber for any other answer (text or slider). |
The answer box keeps going for a short answer period after you record the answer (5 seconds unless the activity sets another value). This captures the participant’s reaction right after they answer.
Change, reorder or skip questions
You can change the question list during a session. Changes apply to this session only. They don’t change the activity.
- Skip a question: click a later question button to make it the current question. The skipped question stays unasked, and you can come back to it later by clicking its button.
- Ask a question again: click its button and ask it again. The count on the button goes up.
- Reorder questions: drag a question button to a new spot in the row. You can only move questions that are not the current question and have not been asked yet.
- Edit, add or remove questions: click the Manage questions icon at the top right of the Questions tab.
You can’t switch questions or open Manage questions while you are asking or recording an answer. Finish the current question first.
-
Manage questions
The Manage Questions window lists every question in order. Questions that were already asked, and the current question, show a lock and can’t be changed.
- Edit: click the pencil, change the Label or Question text, and click Save.
- Add: click Add Question, enter the question text, and click Add. New questions go to the end of the list.
- Remove: click the trash icon, then click Confirm?.
Click Done to close the window.
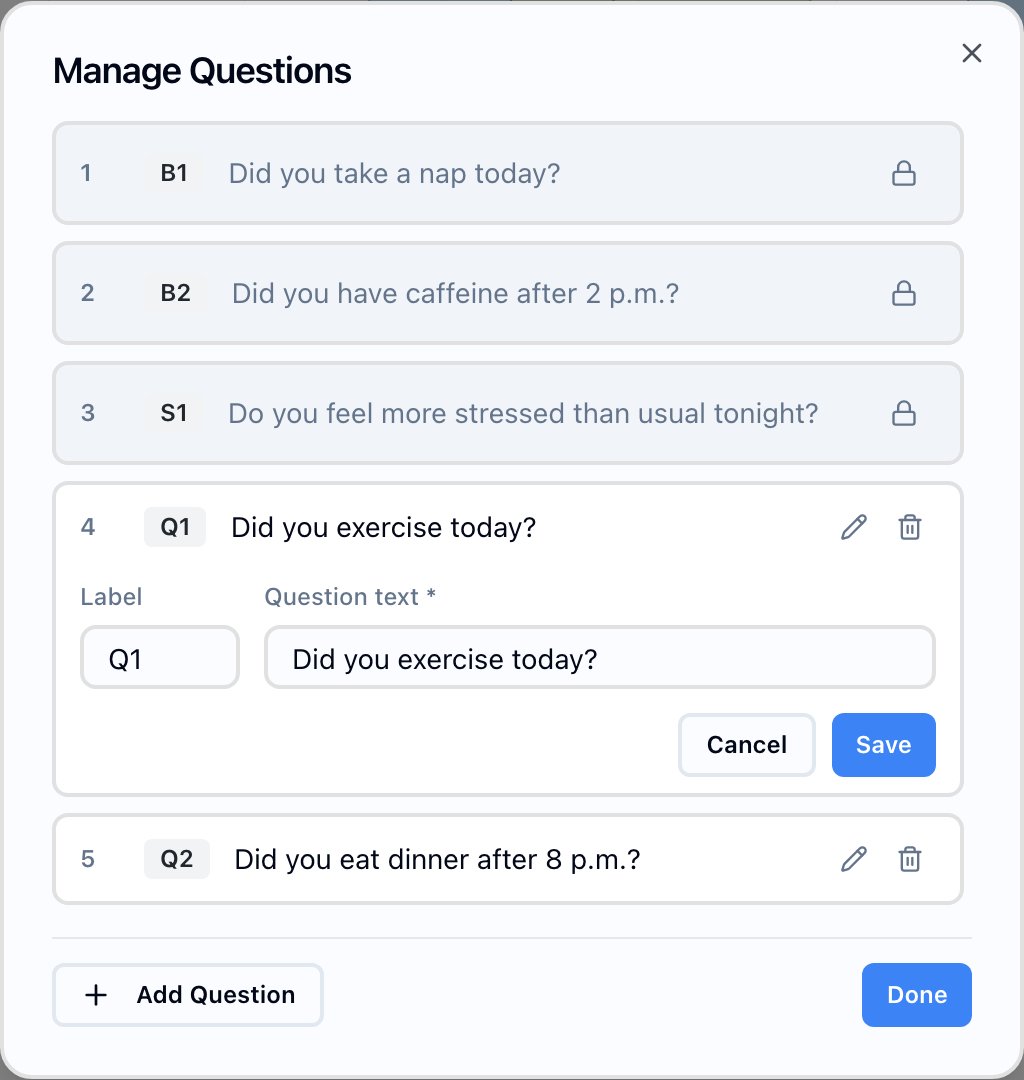
Locked questions can't be changed. Questions that haven't been asked can be edited or removed.
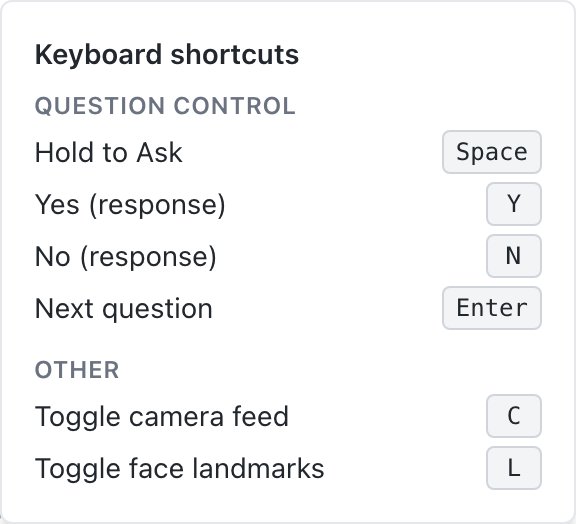
Keyboard shortcuts
Shortcuts work when the cursor is not in a text field. To see them during a session, click the keyboard icon at the top right of the Vitals Timeline.
| Key | Action |
|---|---|
Space | Hold to ask. Press when you start reading the question, let go when you finish. |
Y | Record Yes (Yes/No questions, while awaiting a response). |
N | Record No (Yes/No questions, while awaiting a response). |
Enter | Next question (after the response is recorded). |
C | Show or hide the Camera Feed. |
L | Show or hide face landmarks. |
E | Show or hide notes and events. |
To change a key, click the gear icon next to the keyboard icon. In Keyboard shortcuts, click Rebind next to an action and press the new key. Your organization may also set different default keys for an activity.